The Vanagon cooling system runs the length of the vehicle. For details about how the system functions, please check out our article, "Cooling System in Vanagons: Explained." The article you are reading now is about one specific component of the cooling system; the Expansion Tank.
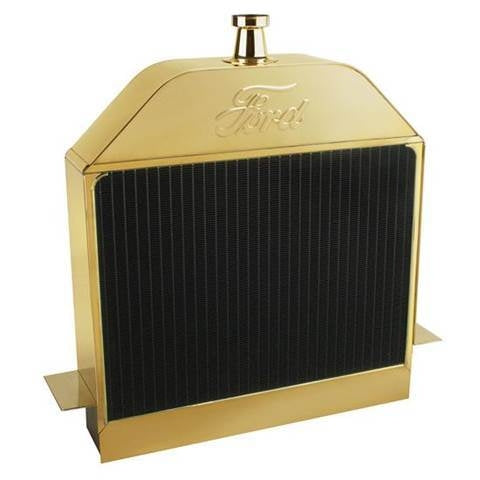
In the old days, coolant tanks were part of the radiator, as demonstrated on this brass Ford Model T radiator. This radiator does not have any fitting at the radiator filler cap neck. That is because the tank on the radiator was so big, and the radiator was so over-sized for the power of the engine, and the cooling system ran so cool that there was plenty of space in the radiator tank itself for the coolant to expand into as it warmed up.
In an effort to make the front area of vehicles smaller and smaller—for reasons of aerodynamics, the radiator had to shrink, too. In order to do this, the expansion tanks (one on each side like in the photo, or one top and bottom) on the radiator were reduced in size, like the silver one below. A radiator like this would have a separate, non-pressurized coolant overflow tank. When the coolant expanded as it got hot, it needed a place to go outside of the radiator, and then it would return to the tanks on the radiator when the system cooled off between uses. The one used with a radiator like the silver one below might have looked something like the image on the right below.

All water-cooled Vanagons have an overflow tank like the one pictured below. It is located right in front of the rear license plate door.

As time went on, radiators shrunk in size to an absolute minimum until the “tanks” on them were essentially nothing more than manifolds, as is the case with the Vanagon radiator as shown below.

At around the same time radiators were getting smaller and the tanks on them were disappearing, the need for higher and higher coolant temperatures – for reasons of efficiency, also occurred. Because of these two factors, an additional expansion tank concept was born. The difference between an overflow tank and an expansion tank is that an expansion tank holds pressure, while an over-flow tank does not.

The expansion tank on a Vanagon is located in the back of the vehicle next to the engine. Ironically, in the case of a Vanagon, the use of an expansion tank is not because the engineers were trying to make the front of the vehicle smaller (indeed, it is definitely not small!). Rather, the remote expansion tank was employed due to the overall layout of the vehicle's cooling system: radiator way up front, engine in the back, along with an expansion tank as shown to the right.
The hose that attaches to the cap at the top of the expansion tank runs to the bottom of the overflow tank. Thus, when the cooling system heats up and the coolant expands, overflow of coolant flows to the overflow tank. When the system cools off, the coolant flows back to the expansion tank—keeping it completely full of liquid and free of air.
These expansion tanks have been the source of great disappointment over the years. This is not, however, because the original design was flawed. In fact, the original tanks were known to last well over 20 years. The disappointment began when the original VW-made tanks became obsolete, and many different manufacturers started producing an aftermarket tank—most of which are... well, junk. Some tanks would literally melt the first time the engine got a little too hot. This led to some of our competitors claiming the design was flawed, necessitating a tank made of metal instead of plastic. This is really not the case.
One only needs to look under the hood of every modern car to see, almost without exception, a plastic expansion tank. Plastic is the best material, plain and simple. It is lightweight, transparent, corrosion-proof and inexpensive in large quantities. Plus, a plastic tank can be easily shaped to achieve maximum space and strength efficiency. Metal tanks on the other hand, possess none of these benefits. Regardless, the problem of unreliable quality in the case of a Vanagon is a real problem in need of a real solution.
We have experimented with all of the plastic iterations that have appeared over the years. Every time a new brand one came on the market, we would jump at the chance to check it out. The melting problem seems to have been solved universally (wrong material, plain and simple, duh) but, from time to time, even the most reliable brand will have some other issue, like a cap issue for example, or a random pin-hole leak. The one thing that has not changed is that going with best plastic tank is by far the least expensive way to go with respect to the actual part.
You can play it really safe and consider the expansion tank a "maintenance item," replacing it and the level sensor every five years. Typically, the tanks will yellow and become brittle over time, like this:

And eventually, cracks will appear, like this:

This crack was actually leaking, but the beginning signs of the crack appeared long before it started leaking. Bottom line: a high-quality plastic tank replaced regularly remains the best bang for your buck! That is, if you are doing it yourself and carry a spare… If you are not, the labor cost can be costly. Then there is also the issue of inconvenience having to carry an extra tank, tools, and possibly the cost of an engine – if you don’t catch it in time and overheat.
For these reasons, we decided to roll up our sleeves and design our own, metal tank. Naturally looked around to see what was already out there. We did not find anything on the market that we felt fulfilled all of our design criteria. They all lacked several basic features we felt were required for a truly drop-in replacement. Plus, they were in our opinion over-priced. Our tank not only needed to be affordable, it had to literally drop in without any changes to the rest of the cooling system or vehicle, and had to have some sort of way to see the fluid level inside the tank—even though it was made of metal. It also had to have the basic design elements of the original VW design, not the least of which was a special column around the level sensor to prevent low-coolant level false-alarms.
Here is what we came up with: Features:
• Accepts the OEM coolant level sensor-installed in exact copy of the OEM anti-false-alarm fluid control column
• Sight glass for accurate coolant level readings (Visible from behind the license plate door!)
• Installs perfectly into the original tank bracket without any modifications to the cooling or electrical systems
Yes, this tank cost close to 10X the cost of a plastic tank, and works NO BETTER than a plastic tank. Well, except, there is that nifty feature of a clear sight glass visible from through the license plate door (instead of pulling ALL YOUR CAMPING STUFF out of the back to open the engine compartment lid!). Oh, and it also has the overflow hose fitting on the tank instead of the cap. Oh, yeah, it also uses a standard, found-anywhere-coolant-cap with a pressure relief-lever on it. Ok, I guess it is way, way better!
Replacing the tank on any 1986-91 Vanagon is very easy and quick. If the tank is replaced in this way, it will take about 20 minutes and no air will be introduced into the system:
- Pinch both coolant hoses on the tank with hose pinch pliers.
2. Remove clamps at tank using channel-lock pliers.
3. Remove tank (hoses remain in place in the engine compartment).
4. Install new level sensor in replacement tank. We recommend using soapy water on the O-ring. Hand tighten only!
5. Install new tank and sensor assembly.
6. Attach hoses and hose clamps—but do NOT un-pinch the cooling hoses yet!
7. Fill tank with mixture of 50/50 phosphate-free coolant/distilled water.
8. Remove pinch pliers from hoses.
You're ready for a worry-free trip! Well... you won't have to worry about your expansion tank, at least!