Larger Capacity LP Tank w/Level Indicator
$1,218.00

Stove Lid Gas Strut Conversion Kit [Vanagon]

| Product: | GW-V-STOVE-STRUT |
|---|---|
| Works With: | 1980-1991 |
| Manufacturer: | GoWesty |
| Availability: | Only 2 Left in Stock! |
| Wrench Rating: |  Requires some hand & power tools and minimal mechanical knowledge. |
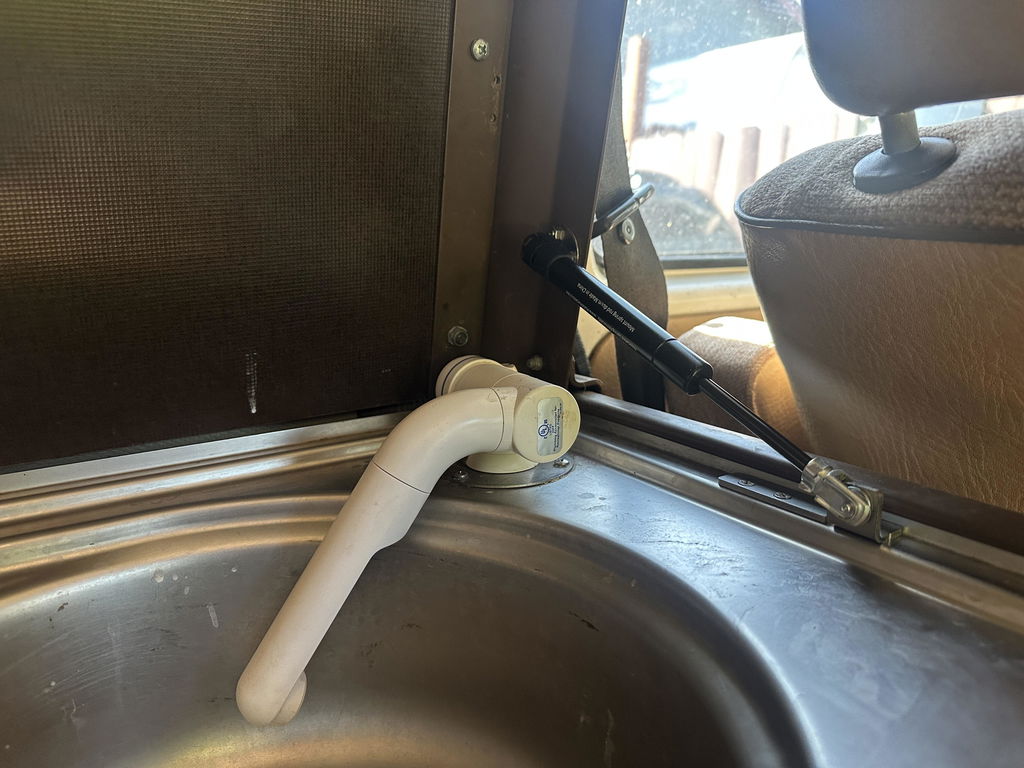
This kit is over the top…of the stovetop that is! You won’t miss fooling around with your clumsy old stove lid scissor-prop after you install this kit! Automagically lift your lid with our gas energized strut system, and open or close your stove with just one hand!
Fits: All early 1980-83, and late 1983-91 Vanagon Westfalia Camper. How can you tell which you have? Good question! The easiest way to tell is where the bottom of the factory support is located. Early vans will have the prop base screwed into the wooden cabinet surround, and the late vans have the prop base riveted directly into the stainless steel around the sink.Please make your selection in the drop-down menu.
Kit Includes:
• (1) Stove Lid Bracket
• (1) 10mm Ball Stud Mount
• (1) Gas Strut
• (1) Strut Clevis End
• (1) Strut Ball End
• Complete mounting hardware and instructions for both early and late vans
To download or print these instructions, click the arrow in the top-right corner of the viewer below, then use the print or download controls in the opened document. Open PDF in a new tab
Reference numbers can be OE part numbers, superseded part numbers, and compatible part numbers. We provide this information to help ensure you're getting the right part for your needs.
Handy — Requires some hand & power tools and minimal mechanical knowledge.
 Plug 'n' Play — Requires no or basic hand tools and no mechanical knowledge.
Handy — Requires some hand & power tools and minimal mechanical knowledge.
 DIY — Requires a full tool set and broad mechanical knowledge.
 Pro — Requires professional-level tools, talent and experience.
Proposition 65: This product may contain chemicals known to the state of California to cause cancer, birth defects, or other reproductive harm.
I think this is so cool, I appreciate GoWesty always working to develop better items for Our old vans, pretty easy installation and supreme functionality. Price is great for what you get. No more locking hatch here!
Installation can be tricky but it works as intended and is a great upgrade. I have a few tips. The strut comes with an extra ball end and does not look like the pictures so you’ll have to remove that. I also had difficulties with the stencil included in the instructions. After using the stencil exactly as instructed, my countertop screw points were off by a few mm so I had to drill new ones as it is almost impossible to shorten the strut by hand. Double-checking the stencil location with the actual hardware partially assembled will help.
Excellent - the intructions are a bit haphazard as the model I bought this for was for the early Westy, and the picture that was scribbled on top of with red (in the instructions) was actually exactly what needed to be done.
This is a nice upgrade to the stove and sink cover.
It works very well. I wish we had this sooner. I was even able to install the bottom section without removing the stove face. The template was very helpful. Tip: punch holes first on the actual template. Taping the template on the side of the stove lid helps keep it secure; then punch the holes before drilling. The holes on the paper keeps the punch in the center.
wont smash my hands
After replacing the flimsy stock mechanism twice, it was time for the overkill option. Dig it.
I used the instructions for the early van. I have an '82. I bought this a while ago and just now got to the install. The strut will not budge so not sure if it is malfunctioning or not. Based on the template you basically will need to remove your faucet. Then there is the fact they cannot provide finished install photo, is it that difficult to take a picture or diagram of how the final install should appear for the early models. I'm fuming as I'm typing this and since it has been a while since my purchase I have a feeling I won't be getting a replacement strut or my money back so most likely I've wasted my time and will be tossing this in the trash!
87 Syncro camper, Tin-top converted to a camper, believe 86 or 87 cabinetry. main reason for strut-kit is my old stove lid prop raddled like crazy when driving down gravel roads! I had same problem as Chris P, luckily measured first, I compressed strut as far as it would go and measured center to center and came up with approximately 5.5 inches, using a small square and a lot masking tape to mark centers on cabinet I could tell 8.0 inches was not going to work for my setup, so I went with 8.625 and had about .25 travel left on strut when lid closed, so 8.5 would have been a good number for me.
Couple other little things I did, deburred all the sharp edges on lower bracket being next to sink work area, and replaced the two sheet metal screws and Tinnerman fasteners with machine screws, SS 6-32 x 1.0 flatheads
Unfortunately the directions were not accurate for my 87 camper. I drilled the holes where instructed (front of the template at 8 inches back) and my strut would bottom out before closing so i couldn’t close the lid without severely warping the aluminum sink plate. I had to re drill with the template at 8.5 inches back and that still puts pressure forcing the plate forward but at least it closes. Check very carefully, and possibly drill at 8 3/4 back.
Hi Chris, we are making an update to the instructions to reflect the minor differences in the stove tops. The improved instructions should prevent future holes from being drilled in the wrong place. Thank you for your business and your feedback!
Excellent! Great instructions!